Selections in photoshop, how to use them in Black and White photography?
Selections in Photoshop
If you look at my black and white pictures, on every one I took the opportunity to adjust single parts of the photograph separately through making selections in Photoshop. Do you want to work separately for example on sky and seperatly on the rest of the picture? No problem. For making selections in Photoshop, I use two functions.
Quick selection tool
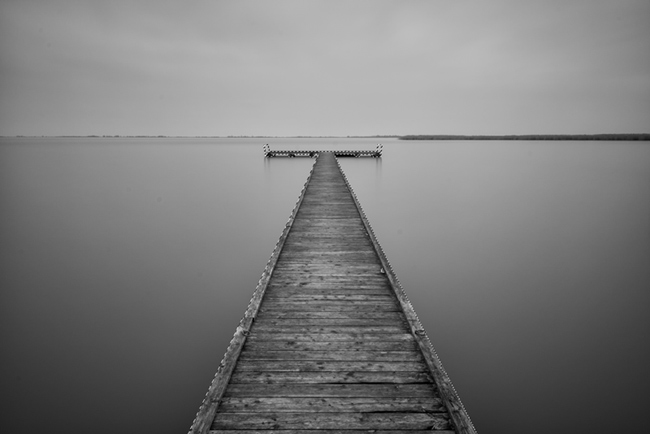
First I always use the quick selection tool, I sign the part of the photograph that I want to use later for further adjustment. For example this pier.
As soon as I have the pier signed, for more precise selections in photoshop I use the function “quick mask” by clicking on the icon at the bottom left below the switching between foreground/background or simply by pressing the letter Q. Everything that is not signed is highlighted in red.
 For the most accurate selection I mostly zoom the picture up to 400% and pass through the whole section of the picture. It´s up to you how precise selection you create, of course it depends on the purpose of use and your demands on the final output. In all the pictures I am going to maximum what sometimes requires to proceed even after pixels. Sometimes I work several days on one photograph until I am absolutely satisfied with it.
Tip: for selections buy Wacom!
Once I knew that selections become an integral part of adjustment of each photograph in computer I very quickly realized that working with mouse is, at best say, to defeat. I started to search the Internet and I watched a number of references and stated that the best choice is to buy Wacom Intous 5M (medium size). And I am glad I did it, today, I would never change it for mouse, not even by accident. It is difficult when you start working with it, it needs some practice to get used to this tablet but once you mastered working with it you will not want to give it up. I almost do not use the mouse!
Be careful when sharpening the photograph!
When you adjust the parts of the photograph this way, basically, you cut the parts of the photograph and then fold up the modified parts back into a single one. In sharpening of the final photograph be careful, if you have not done the selection exactly, on the edges of the photograph will arise the white border which is visible!
 Such a defect can hide when printing small prints, once we are talking about large format printing, such a defect is inadmissible. Fortunately, it is very easy to remove it through the cloning tool, yes, again it will not take a minute but if we want to move our creation on higher level, it will not be a problem for anyone.
The white border can be simply removed by using the cloning tool in Photoshop.

If you have any questions, please feel free to ask!
Hi Matej,
Nice article!
I have bought a Wacom myself this week to get better selections & have a better workflow.
But I have a question, hoping that you can give me an answer:
If I make a selection in Photoshop and go further with the processing of the image, I notice that the outlines of some selections are to hard, to noticable.
Can you tell me what the solution is for that? Feather seams to do some good, but still not the best result.
Many thanks!
Dimitri
Hi Dimitri,
working with selections is hard and you must be absolutely precise doing them. Very often I zoom my picture to almost 500%. And at the final stage I use the clone stamp to refine the edges with soft pressure opacity brush.
I hope this helps a bit.
Matej
Hi Matej,
Thanks for the reply!
I know it’s hard to make good selections, I did it with the mouse for some time so that’s even harder. Working with the Wacom is not that easy also, but I feel already I have more control and I like it already more than the mouse.
Something I forgot to ask in my first comment:
If I start to make a selection – with pen pressure on both Shape Dynamics and Transfer turned on – and I come to the edge of an object, I don’t push the pen as hard so I don’t get to much selected. But is this the right way?
I looked at several tuts but dunno what’s the best way to do it.
Many thanks!
Dimitri